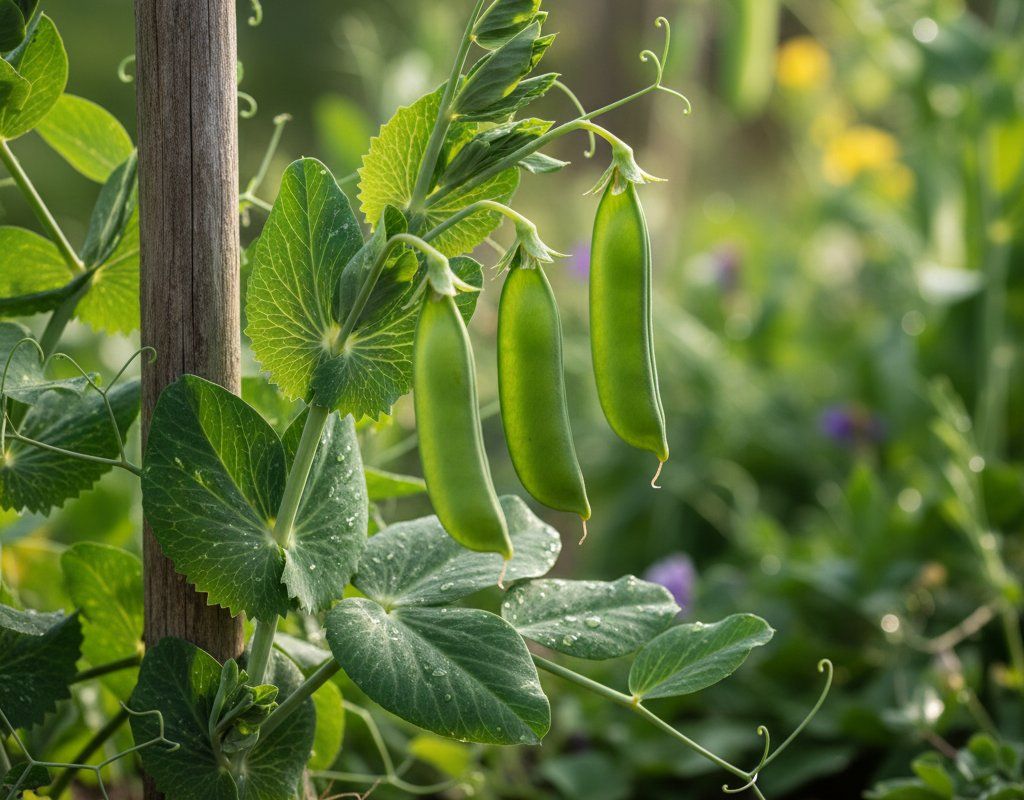
Peas in Zone 9B — Texas
Pisum sativum · Your Complete 2026 Planting Guide
Harvest Time!
Your Peas should be producing now!
Harvest Tips
Pick when pods are firm but seeds inside are still small. Check daily!
How to Plant Peas in Zone 9B — Texas
Here are all your options for getting peas in the ground, from the easiest method to more advanced approaches.
Direct Sow Seeds
RecommendedLate December through late September
around December 25
Consider succession planting every 2-3 weeks for continuous harvest.
Peas prefer cool soil and don't transplant well. Direct sow in early spring.
Buy Starts
Works WellEarly January through early February
around January 8
Plant purchased starts after last frost (February 5).
Start Seeds Indoors
ChallengingThis plant is typically not started indoors.
Transplant Outdoors
Timing InfoEarly January through early February
around January 8
Can tolerate light frost, but wait for soil to be workable.
You have a nice window — no need to rush.
Fall Planting
Late September through late October
October 8 ideal · Direct sow for fall harvest
Plant a second crop in mid-summer for fall harvest. Peas actually prefers the cooling temperatures of fall.
Overview
Peas bring that sweet, crisp flavor you just can't get from the grocery store to your Texas garden. While they prefer cooler weather, our long growing season means you can enjoy fresh peas from late winter through spring and again in fall when that brutal Texas heat finally breaks. There's nothing quite like stepping out to harvest sugar snap peas for dinner while your neighbors are still dealing with frozen vegetables from the store.
Yes, our unpredictable weather and extreme summer heat make peas challenging during peak summer, but with our 308-day growing season, you have plenty of opportunities to grow them successfully. The key is working with our climate—plant early in late winter for a spring harvest, then again in fall when temperatures drop below the mid-80s for a second crop.
Transplanting Outdoors
While peas can be transplanted, they don't particularly like having their roots disturbed. If you choose this route, transplant your seedlings from early January through early February, when soil temperatures are still cool and the worst of winter is behind us.
Harden off your seedlings gradually over a week, starting with just an hour or two outside during the mildest part of the day. Space them 2-4 inches apart in rows, giving the vining types room to climb. Watch the weather closely during this period—those unexpected late January cold snaps can still surprise us, though they're usually brief.
Keep newly transplanted peas consistently moist but not soggy. The variable humidity in Texas means you'll need to check soil moisture more frequently than gardeners in other regions.
Direct Sowing
Direct sowing is absolutely the way to go with peas in Texas. You can start as early as late December when soil temperatures drop into the 40s and 50s, and continue through late September for fall plantings. The key is getting them in the ground when soil temperatures are cool—peas actually prefer soil around 45-65°F for germination.
Work compost into your planting area, but don't add nitrogen-rich fertilizers since peas fix their own nitrogen. Plant seeds 2-4 inches apart and about an inch deep in loose, well-draining soil. If you're planting in late winter, choose a spot that gets full sun to help warm the soil. For fall plantings, partial shade can actually help protect them from any lingering heat.
Peas don't transplant well because they develop deep taproots quickly, so direct sowing eliminates transplant shock entirely. Just keep the soil consistently moist until germination, which usually takes 7-14 days depending on soil temperature.
Watering Peas in Zone 9B (Texas)
Peas need consistent moisture but can't handle waterlogged conditions—a real challenge with our unpredictable Texas rainfall that can swing from drought to flash floods within days. During their flowering and pod development stages, even moisture is critical since drought stress during flowering causes poor pod set and tough, disappointing peas.
Aim for about an inch of water per week, but adjust based on our variable rainfall. Use the finger test—stick your finger 2 inches into the soil near the plants. If it's dry at that depth, it's time to water. During the hot spring days when temperatures start pushing into the 80s and 90s, you might need to water every other day.
Water at the base of plants rather than overhead, especially during our more humid periods when wet leaves can encourage fungal problems. Overhead watering during low humidity periods is fine, but avoid watering in the evening when humidity typically rises. A 2-3 inch layer of mulch helps retain moisture and keep roots cool, which is especially important as spring temperatures climb toward summer.
Watch for signs of stress: wilting during the heat of the day (even with adequate soil moisture) is normal, but if plants don't perk up by evening, they need more water. Overwatering shows up as yellowing leaves and poor growth—remember, our clay soils hold water longer than you might expect.
Supporting Your Peas
Even dwarf pea varieties benefit from some kind of support in Texas, where our unpredictable weather can include sudden thunderstorms and hail. A simple trellis, string support system, or even pea brush (twiggy branches stuck in the ground) works well for shorter varieties. Tall climbing peas need a sturdy 4-6 foot trellis or fence.
Install your support system at planting time to avoid disturbing roots later. Peas climb using tendrils that grab onto whatever's available, so chicken wire, string trellises, or even a simple fence work perfectly. The support also improves air circulation, which helps prevent fungal issues during our more humid periods.
As plants grow, gently guide the main stems toward the support if needed. Once they start climbing, they'll pretty much take care of themselves. Good support also makes harvesting much easier and keeps pods off the ground, away from our ever-present fire ants.
🧪Fertilizing Peas
Feeding Schedule
Organic Fertilizer Options
Harvest Time
Your first peas should be ready from late February through early March for winter sowings, with fall-planted peas producing from mid-November through mid-December. With our 60-day maturity period, you'll have a pretty good idea when to start checking for ready pods.
For shell peas, harvest when pods are plump and you can feel the round peas inside, but before the pods turn yellow or start to dry out. Sugar snap peas should be picked when pods are full but still crisp and bright green. Snow peas are best harvested when pods are flat with just tiny bumps where the seeds are developing. Check your plants daily during peak harvest—peas can go from perfect to overripe quickly, especially as spring temperatures climb.
Harvest in the morning when pods are crisp and full of moisture. Pinch or cut the stems rather than pulling, which can damage the plant and reduce future production. Keep harvesting regularly to encourage continued pod production—plants that are allowed to fully mature their pods will stop producing new ones.
As temperatures start climbing consistently into the 90s in late spring, your pea plants will start declining. This is normal—they're cool-weather crops that naturally wind down as heat increases. Pull plants once production stops and add them to your compost pile, roots and all, since they've been fixing nitrogen in the soil.
Common Problems in Zone 9B (Texas)
Powdery Mildew This shows up as white or grayish powdery coating on leaves, stems, and sometimes pods. Leaves start curling, turning yellow, and eventually dying, which really weakens your plants. You'll often see it first on older, lower leaves before it spreads upward.
Our Texas climate creates perfect conditions for powdery mildew with warm days, cool nights, and variable humidity. Unlike most fungal diseases, powdery mildew actually prefers dry leaf surfaces, so it can strike even when you're being careful about overhead watering. Improve air circulation by proper spacing and removing lower leaves that touch the soil. Neem oil or potassium bicarbonate sprays help control it, and surprisingly, a milk spray (1 part milk to 9 parts water) is quite effective when applied weekly.
Pea Aphids These small, soft-bodied green or pink insects cluster on new growth, stems, and undersides of leaves. Heavy infestations cause leaves to curl, yellow, and become distorted. You might also notice sticky honeydew on leaves and black sooty mold growing on the honeydew.
Pea aphids multiply rapidly in our mild winter and early spring conditions. They're often brought in by ants (including our fire ants) who farm them for honeydew. Encourage beneficial insects like ladybugs and lacewings by avoiding broad-spectrum pesticides. For small infestations, spray plants with a strong stream of water. Insecticidal soap or neem oil works for heavier infestations.
Root Rot Plants with root rot show stunted growth, yellowing leaves, and may wilt even when soil is moist. If you pull up an affected plant, you'll see dark, mushy, or discolored roots instead of healthy white ones.
Our unpredictable rainfall and clay soils create conditions where root rot fungi thrive. Poor drainage is usually the culprit, especially after heavy spring rains or if you're overwatering during dry spells. Improve soil drainage by adding compost and avoid overwatering. Plant in raised beds if your area tends to stay soggy after rains. Once root rot sets in, there's no cure—remove affected plants and improve drainage before replanting.
Texas Specific Challenges: Our extreme heat means peas have a limited window—they'll struggle once temperatures consistently hit the upper 80s and 90s. The unpredictable weather swings from mild to hot can stress plants, and our variable humidity creates perfect conditions for fungal diseases. Flash floods can drown plants while drought periods stress them just when pods are forming.
Best Companions for Peas
Plant these nearby for healthier Peas and better harvests.

Keep Away From
Companion Planting Details
Peas make excellent companions for cool-season root crops in your Texas garden. Plant carrots, radishes, and turnips nearby—the peas fix nitrogen in the soil that these heavy feeders appreciate, while the root crops help break up clay soil and don't compete for the same nutrients. Corn works well as a later companion since peas will be finishing up as corn starts growing, and the corn stalks can even serve as natural trellises for climbing varieties.
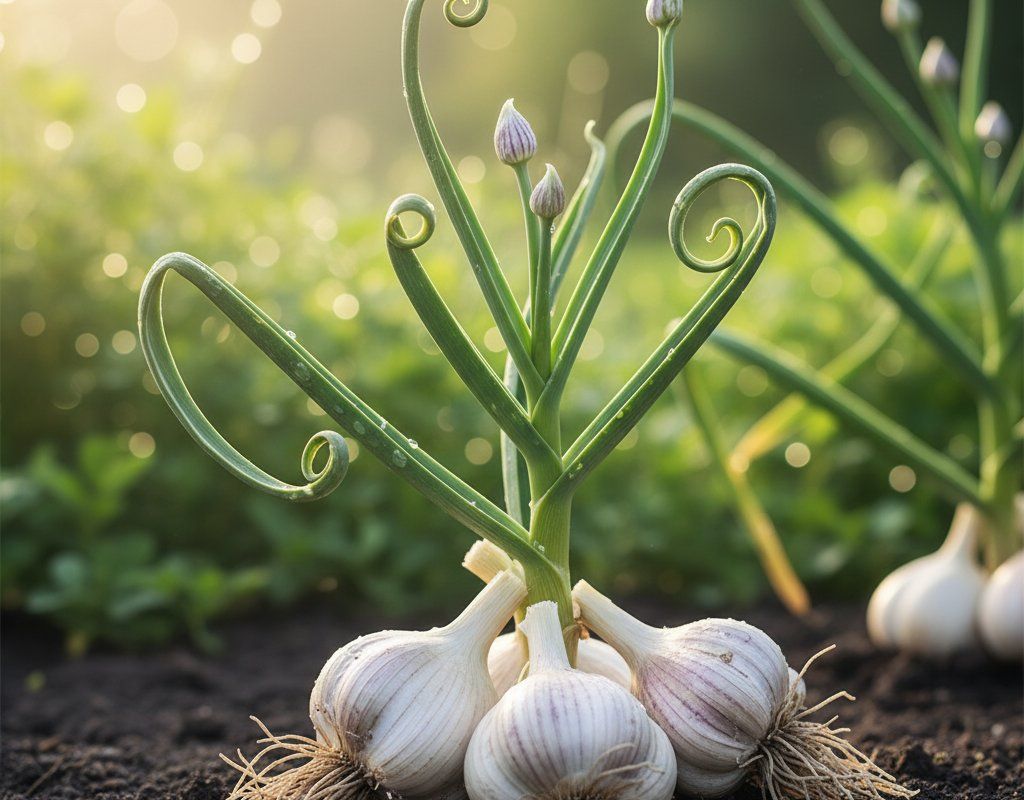
Avoid planting peas near onions and garlic, which can actually inhibit pea growth through natural compounds they release into the soil. These alliums also prefer different watering schedules than peas—they like drier conditions while peas need consistent moisture. In our Texas clay soil, this incompatibility becomes even more pronounced since drainage issues affect each crop differently.
🌸Best Flowers to Plant with Peas
These flowers protect your Peas from pests and attract pollinators for better harvests.
For Pest Control

For Pollinators

Get a Reminder When It's Time to Plant
We'll email you when key planting windows open for your zone.