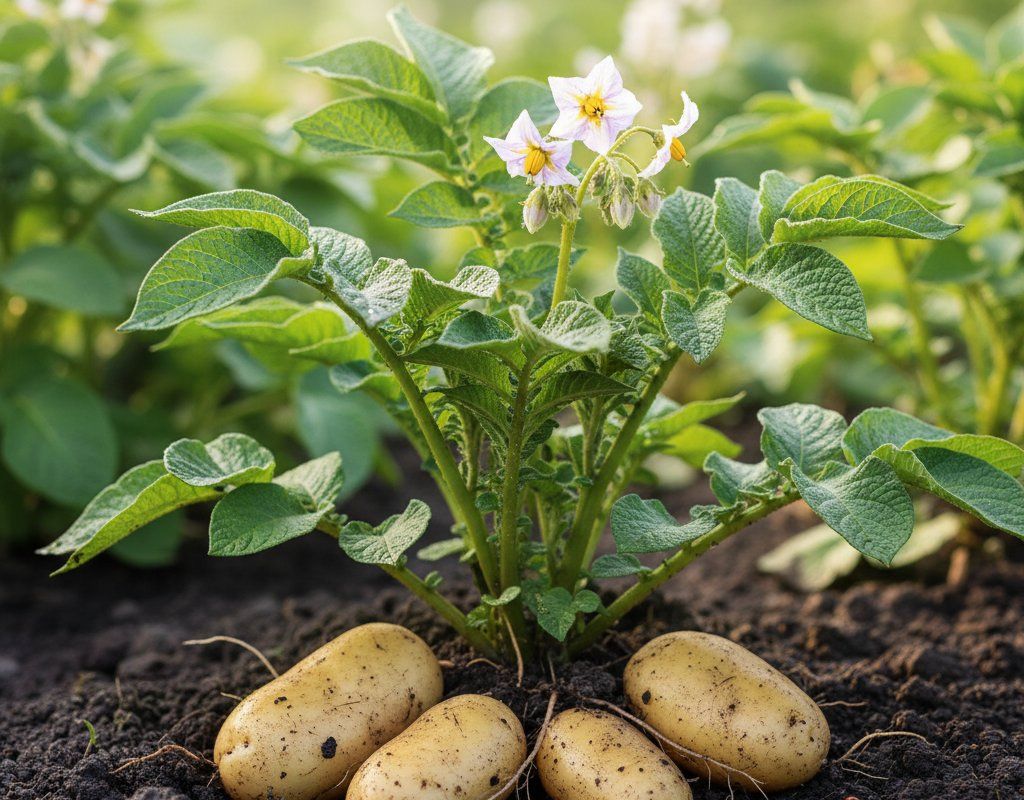
Potato in Zone 4A — Northeast
Solanum tuberosum · Your Complete 2026 Planting Guide
Planning Ahead — Great!
You’re ahead of the season. Here’s when to start.
Mark Your Calendar
How to Plant Potato in Zone 4A — Northeast
Here are all your options for getting potato in the ground, from the easiest method to more advanced approaches.
Direct Sow Seeds
RecommendedEarly May through early June
around May 1
Direct sow as soon as conditions allow.
Plant seed potatoes directly in the ground. Not grown from true seed.
Buy Starts
Works WellEarly to late May
around May 1
Plant purchased starts after last frost (May 15).
Start Seeds Indoors
ChallengingThis plant is typically not started indoors.
Transplant Outdoors
Timing InfoEarly to late May
around May 1
Can tolerate light frost, but wait for soil to be workable.
Plan to transplant within a few weeks of your target date.
Overview
Potatoes are a perfect fit for our Northeast climate, transforming our short but productive growing season into bins full of creamy, flavorful tubers. Our cool nights and moderate summer temperatures create ideal conditions for steady growth without the stress that intense heat brings elsewhere. There's something deeply satisfying about digging your first hill of new potatoes in late July, knowing you've grown one of the most versatile staples in your kitchen right here in rocky New England soil.
While our 128-day growing season might seem limiting, potatoes actually thrive within these constraints. The key is working with our natural timing - getting seed potatoes in the ground after the soil warms in early May gives you plenty of time for a full harvest before our first frost arrives in mid-September. Even late spring cold snaps rarely damage established potato plants, making them one of the more forgiving crops for Northeast gardeners.
Transplanting Outdoors
Since potatoes grow from seed potatoes rather than transplants, you won't be moving seedlings from indoors to your garden beds. However, if you've pre-sprouted your seed potatoes indoors (a technique some gardeners use to get a head start), you can plant these sprouted tubers from early to late May once soil temperatures consistently reach 45°F.
Handle pre-sprouted seed potatoes carefully during this transition period, as the young shoots are fragile and can break off easily. Plant them immediately after removing from indoor conditions - there's no gradual hardening off process needed since the potato itself provides the energy for initial growth. Space each seed potato 12 inches apart to give the developing root system and future tubers adequate room to expand.
Be aware that late May cold snaps can still damage emerging shoots, so keep row cover handy if temperatures threaten to drop below 32°F after planting. The underground tuber will survive light frosts, but any green growth above ground is vulnerable to damage during our unpredictable spring weather patterns.
Direct Sowing
Direct planting seed potatoes is the standard method for Northeast gardens, and you have a comfortable window from early May through early June to get them in the ground. Wait until soil temperatures reach at least 45°F consistently - cold, wet soil will cause seed potatoes to rot before they can establish roots. Your soil should also be workable without forming clumps, which can be challenging in our clay-heavy and rocky New England soils.
Prepare your planting area by working in compost or aged manure to improve drainage and soil structure. Cut larger seed potatoes into pieces with at least two eyes each, letting the cut surfaces cure for 24-48 hours before planting to prevent rot. Plant each piece 3-4 inches deep and 12 inches apart in rows spaced 2-3 feet apart. This spacing accommodates the spreading nature of potato plants while making cultivation and hilling easier throughout the season.
As shoots emerge and grow 6-8 inches tall, begin hilling soil around the stems to prevent tubers from developing green skin from sun exposure. Our moderate summer temperatures make this process less urgent than in hotter climates, but consistent hilling every 2-3 weeks ensures better yields and prevents the bitter taste that comes with green potatoes.
Watering Potato in Zone 4A (Northeast)
Potatoes need consistent but not excessive moisture throughout their growing season, and our Northeast climate patterns work well with their preferences. During the establishment phase in May and June, aim for about 1 inch of water per week, including rainfall. Our typically adequate spring moisture often means supplemental watering isn't necessary until summer arrives.
The critical watering period begins when plants start flowering in mid to late summer - this signals active tuber formation underground. From flowering through August, maintain consistent soil moisture by providing 1-1.5 inches of water weekly if natural rainfall falls short. Check soil moisture with the finger test, pushing down 2 inches near the base of plants. The soil should feel like a wrung-out sponge - moist but not soggy.
Water at the base of plants rather than overhead, especially given our moderate-to-humid summer conditions that can promote fungal diseases like late blight. Soaker hoses or drip irrigation work particularly well for potato beds. Mulch around plants with straw or grass clippings to retain moisture and regulate soil temperature during our variable summer weather.
Two weeks before harvest (typically early to mid-August for storage varieties), reduce watering significantly to allow tuber skins to toughen. Wet soil during harvest creates ideal conditions for rot and reduces storage life. Watch for signs of overwatering like yellowing lower leaves or a musty smell near plants, and underwatering shows as wilting during the cooler parts of the day when plants should be fully turgid.
🧪Fertilizing Potato
Feeding Schedule
Organic Fertilizer Options
Harvest Time
Your first new potatoes will be ready for harvest in late July, about 60-70 days after planting, when plants begin flowering. These thin-skinned early potatoes are perfect for immediate use but don't store well. Carefully dig around the base of plants with your hands, taking a few small tubers while leaving the plant intact to continue producing larger storage potatoes.
For your main storage crop, wait until the foliage dies back completely in late August through September. This natural senescence indicates that tubers have reached full size and their skins have toughened for long-term storage. Don't be tempted to harvest too early - green foliage means the plant is still actively growing and sizing up tubers underground.
Harvest on a dry day when soil isn't muddy from recent rain. Dig carefully with a spading fork, starting about 12 inches away from the plant base to avoid piercing tubers. Brush off soil but don't wash potatoes intended for storage - the protective skin needs to remain intact. Let freshly dug potatoes cure in a cool, dark, well-ventilated area for 7-10 days before storing.
With our first frost typically arriving in mid-September, plan to complete your potato harvest by early September to avoid any risk of frost-damaged tubers. Even light frosts that don't kill the plants can affect tuber quality if they're still in the ground, so don't push the season too far in hopes of extra growth.
Common Problems in Zone 4A (Northeast)
Colorado Potato Beetle These distinctive orange beetles with black stripes appear in late May through June, just as your potato plants are establishing. Adult beetles overwinter in garden debris and emerge to lay bright orange egg clusters on leaf undersides. The soft-bodied larvae are even more destructive than adults, capable of defoliating plants rapidly during our peak growing season. Look for chewed leaves, orange egg masses, and both adult beetles and red-orange larvae feeding on foliage.
Hand-picking adults and crushing egg masses works well for small plantings, especially effective during cool morning hours when beetles are less active. Row covers during early season growth can prevent initial egg-laying, though you'll need to remove them once plants begin flowering. Beneficial insects like ladybugs and lacewings provide natural control, but severe infestations may require organic approved sprays containing Bacillus thuringiensis or spinosad.
Late Blight Late blight thrives in our moderate-to-humid Northeast summers, particularly during cool, wet periods common in July and August. Initial symptoms appear as large, dark green-gray water-soaked spots on leaves, often starting on lower foliage. In humid conditions, you'll notice white fuzzy growth on leaf undersides, and brown lesions develop on stems and eventually tubers. This devastating disease can destroy entire plantings within days during favorable weather conditions.
Prevention is crucial since late blight spreads rapidly through airborne spores. Ensure good air circulation by proper spacing and avoid overhead watering, especially during humid periods. Apply copper-based fungicides preventatively during wet weather forecasts. If you spot symptoms, immediately remove and bag affected plants - never compost infected material as spores can survive and spread. Choose resistant varieties when available, as genetic resistance provides the best long-term protection.
Scab Common scab appears as rough, corky patches on tuber surfaces, making potatoes unsightly though still edible after peeling. This soil-borne bacterial disease thrives in alkaline conditions and dry soil during tuber formation. Our rocky New England soils often tend toward alkaline pH, creating favorable conditions for scab development, especially during dry summers when many gardeners underwater their potato plants.
Maintain soil pH between 5.0-6.0 by adding sulfur if needed, and ensure consistent moisture during the flowering and tuber formation period in July and August. Avoid fresh manure applications before planting, as high nitrogen and alkaline conditions promote scab. Rotate potato plantings to different garden areas each year, as scab bacteria can persist in soil for several years.
Northeast Specific Challenges Our moderate summer temperatures and variable humidity create perfect conditions for fungal diseases like late blight, requiring vigilant monitoring during wet periods. The short growing season means any setbacks from pests or diseases have a bigger impact than in longer-season regions, making prevention and early intervention especially important for successful potato crops.
Best Companions for Potato
Plant these nearby for healthier Potato and better harvests.

Keep Away From

Companion Planting Details
Potatoes pair exceptionally well with beans and corn in Northeast gardens, creating a productive three-sisters variation. Beans fix nitrogen in the soil that potatoes can utilize, while corn provides vertical structure that doesn't compete for the same soil space as spreading potato plants. Brassicas like cabbage, broccoli, and kale make excellent companions since they mature at different times and help break pest cycles - plant them where potatoes grew the previous season for natural soil improvement.
Horseradish planted at the corners of potato beds helps deter Colorado potato beetles and other pests through its strong root compounds. Avoid planting potatoes near tomatoes, as both are susceptible to similar diseases like late blight and early blight, creating conditions for rapid disease spread during our humid summer periods. Keep potatoes away from squash, cucumbers, and sunflowers, which compete heavily for nutrients and water during the critical tuber formation period when consistent resources are essential for good yields.
🌸Best Flowers to Plant with Potato
These flowers protect your Potato from pests and attract pollinators for better harvests.


Get a Reminder When It's Time to Plant
We'll email you when key planting windows open for your zone.