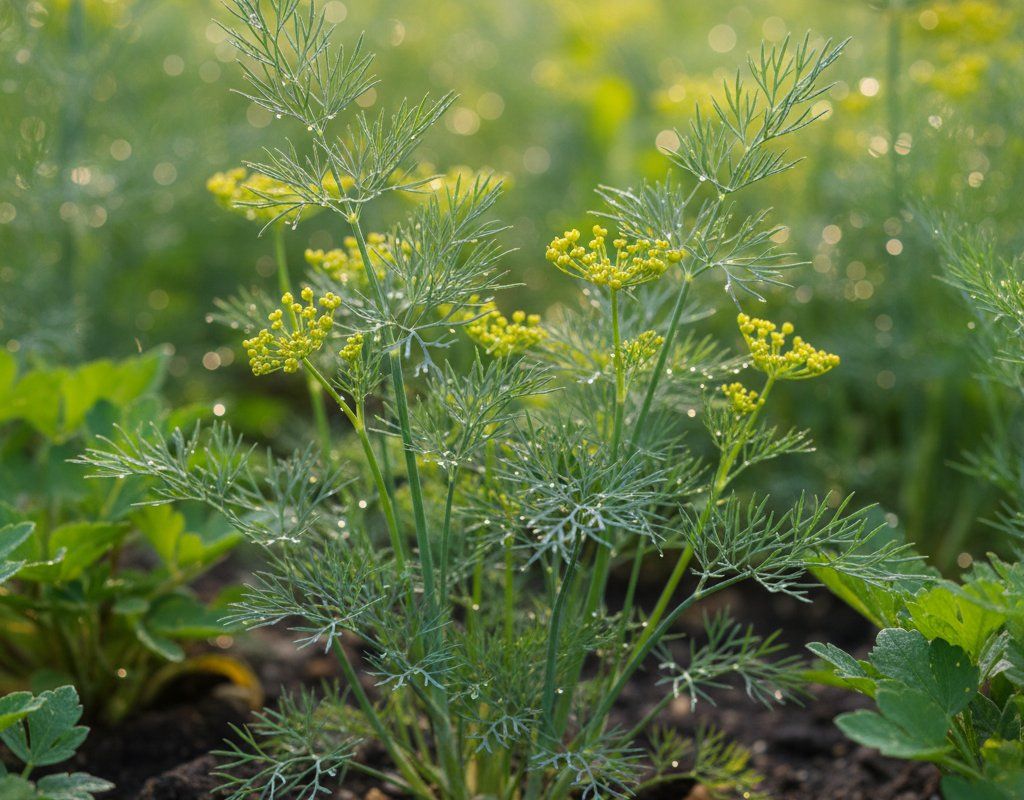
Dill in Zone 4B — Mountain West
Anethum graveolens · Your Complete 2026 Planting Guide
Planning Ahead — Great!
You’re ahead of the season. Here’s when to start.
Mark Your Calendar
How to Plant Dill in Zone 4B — Mountain West
Here are all your options for getting dill in the ground, from the easiest method to more advanced approaches.
Direct Sow Seeds
RecommendedMid May through late July
around May 15
Consider succession planting every 2-3 weeks for continuous harvest.
Dill has a taproot and prefers direct sowing, but transplants work if handled carefully.
Start Seeds Indoors
RecommendedMid April through early May
around April 24
Then transplant: Late May through early July
Start seeds 4-6 weeks before transplanting outdoors.
Buy Starts
Works WellLate May through early July
around May 22
Plant purchased starts after last frost (May 15).
Transplant Outdoors
Timing InfoLate May through early July
around May 22
Can tolerate light frost, but wait for soil to be workable.
You have a nice window — no need to rush.
Fall Planting
Late July through late August
August 9 ideal · Direct sow for fall harvest
Plant a second crop in mid-summer for fall harvest. Dill actually prefers the cooling temperatures of fall.
Overview
Dill is a perfect herb for our high altitude gardens, thriving in our intense Mountain West sun while tolerating the cool nights that other herbs struggle with. The combination of our brilliant sunshine and cool evenings actually improves dill's flavor concentration, giving you more aromatic leaves and seeds than gardeners at lower elevations typically achieve. Plus, dill's hardy nature means it can handle those unexpected late spring cold snaps that catch other herbs off guard.
While our 128-day growing season might seem limiting, dill's quick 40-day maturity and ability to handle light frost actually gives you multiple planting opportunities throughout the season. The key is working with our late spring start and cool nights rather than fighting them – when you time things right, dill becomes one of your most reliable and productive herbs.
Starting Seeds Indoors
Starting dill indoors makes sense mainly if you want an early harvest or live at higher elevations where the outdoor season starts even later. Start seeds from mid-April through early May, about 4 weeks before you plan to transplant outside. Since our Mountain springs arrive late, indoor starting gives you a head start on the short growing season.
Use standard seed trays with good drainage and keep the soil consistently moist with bottom watering – this prevents the delicate seedlings from getting knocked over. Dill seeds germinate best with some warmth, so place trays on a heat mat or warm spot until sprouting occurs. Once germinated, they need bright light to prevent getting leggy before transplant time.
Keep in mind that dill has a taproot and doesn't love being transplanted, so if you start indoors, use deeper cells or small pots to accommodate the root system. Handle transplants gently to avoid root damage that can cause the plants to bolt prematurely.
Transplanting Outdoors
Transplant your indoor-started dill seedlings from late May through early July, once nighttime temperatures consistently stay above 35°F. Our cool Mountain nights can stress young transplants, so wait until the weather settles rather than rushing them outside during those early warm spells that often get followed by surprise cold snaps.
Harden off transplants gradually over a full week, starting with just a few hours of morning sun and working up to full exposure. Space plants 12 inches apart to allow for good air circulation – this helps prevent moisture buildup around the leaves, which can be an issue even in our low humidity climate when plants are crowded together.
Handle the root ball carefully during transplanting since dill's taproot doesn't like disturbance. Water thoroughly after transplanting but avoid overwatering, as our heavy clay soils at altitude can hold moisture longer than expected, especially early in the season when evaporation rates are still relatively low.
Direct Sowing
Direct sowing is actually dill's preferred planting method since it avoids transplant shock and lets the taproot develop naturally. You can sow from mid-May through late July, giving you multiple succession plantings throughout our growing season. The soil should be workable and warming up, though dill handles cool soil better than many herbs.
Prepare your planting area by loosening the soil well – our alkaline Mountain soils can get compacted, and dill's taproot needs room to develop. Sow seeds about ¼ inch deep and 12 inches apart, or plant closer and thin later. The seeds germinate fairly quickly in our intense sun, usually within 7-10 days when soil temperatures reach 60°F.
Direct-sown dill often performs better than transplants in our climate because it develops a stronger root system from the start. This helps the plants handle our temperature swings and low humidity better, plus they're less likely to bolt prematurely from transplant stress.
Watering Dill in Zone 4B (Mountain West)
Dill needs consistent but not excessive moisture, which can be tricky in our dry Mountain climate. Water deeply once or twice weekly rather than daily light watering – this encourages the taproot to grow down and helps the plant handle our low humidity better. Check soil moisture by sticking your finger 2 inches down; water when it feels dry at that depth.
During our peak summer months, when daytime temperatures hit the mid-80s, dill appreciates morning watering to help it cope with the intense UV exposure. However, our cool nights mean the soil doesn't dry out as fast as you might expect, so avoid overwatering. Aim for about 1 inch of water per week, including any rainfall we do receive.
Water at the base of the plants rather than overhead – while our low humidity means foliar diseases aren't as big a concern as in humid climates, wet foliage can still invite problems. Plus, watering at soil level is more efficient in our dry air where overhead watering loses more to evaporation.
A light mulch around the plants helps retain soil moisture and reduces watering frequency, but keep it thin since our cool nights can keep mulched soil too moist if overdone. Watch for signs of stress: wilting during the hottest part of the day (normal) versus wilting that persists into evening (needs water), or leaves turning yellow-green (usually overwatering in our climate).
🧪Fertilizing Dill
Feeding Schedule
Organic Fertilizer Options
Harvest Time
You can start harvesting dill's feathery leaves about 40 days after planting, typically from late June through late September depending on when you planted. Begin cutting individual fronds when plants reach about 6 inches tall, taking outer leaves first and leaving the center growing point intact. The best leaf flavor comes before the plant flowers, so harvest frequently to delay flowering and keep leaves tender.
For continuous harvests, cut stems about 2 inches above soil level – this encourages bushier regrowth rather than just tall single stems. In our intense Mountain sun, dill can grow quite vigorously once established, so don't hesitate to harvest regularly. The oils that give dill its flavor are actually more concentrated during our cool morning hours, making early morning the best time for peak flavor.
If you want dill seeds, let some plants flower and develop seed heads. Wait until the flower heads turn brown and start to dry – this usually happens in late summer. Cut the entire seed head and shake it into a paper bag to collect the seeds. Our dry air actually helps with seed drying, making this easier than in humid climates.
As our first frost approaches in mid-September, harvest heavily since dill won't survive freezing temperatures. You can also succession plant through late July to ensure fresh dill right up to frost time, taking advantage of our relatively long fall growing period when cool nights actually improve flavor.
Common Problems in Zone 4B (Mountain West)
Bolting appears as the plant suddenly sending up a tall flower stalk, with leaves becoming bitter and tough as the plant shifts energy to seed production. In our Mountain climate, bolting is often triggered by the combination of intense UV exposure during long summer days and heat stress, even though our temperatures are moderate. Our alkaline soils can also stress plants if not amended properly. To prevent bolting, provide some afternoon shade during the hottest part of summer, keep soil consistently moist, and make succession plantings every 2-3 weeks rather than relying on a single planting to last the season.
Aphids show up as clusters of tiny green, black, or white insects on stems and leaf undersides, often leaving sticky honeydew residue and causing new growth to curl. These populations can explode quickly once our daytime temperatures warm up consistently, and they're actually attracted to the stress hormones plants produce in our intense UV environment. A strong spray from the hose works well in our low humidity – the insects dry out quickly and can't recover easily. Encourage beneficial insects like ladybugs, and avoid over-fertilizing with nitrogen, which makes plants more attractive to aphids.
Caterpillars (particularly parsleyworms, which are black-banded green caterpillars) chew large holes in leaves and can defoliate plants quickly. These are actually the larvae of black swallowtail butterflies, which are common in our area and find dill irresistible. Hand-picking works well for small infestations, or use Bt (Bacillus thuringiensis) for heavier problems. The caterpillars are more active during our warm days, so check plants regularly in mid to late summer.
Mountain West Specific Challenges: Our combination of moderate altitude heat, intense UV, and low humidity means dill can actually handle more sun than typical growing guides suggest, but it also means plants can stress quickly if water runs short. The alkaline soil common in our region can cause nutrient lockup, so adding compost annually helps buffer pH and improves nutrient availability.
Best Companions for Dill
Plant these nearby for healthier Dill and better harvests.

Keep Away From
Companion Planting Details
Dill pairs beautifully with cabbage family crops like broccoli and kale in our Mountain gardens – it helps repel cabbage worms while the brassicas' broader leaves provide some shade that prevents dill from bolting too quickly in our intense sun. Cucumbers also make excellent companions since dill attracts beneficial insects that help with cucumber beetle control, plus both crops appreciate consistent moisture in our dry climate. Onions planted nearby help repel aphids and other pests while their upright growth doesn't compete for space with dill's feathery foliage.
Avoid planting dill near carrots, as they're in the same family and can cross-pollinate, affecting flavor and potentially attracting similar pests. Keep dill away from tomatoes too – while some gardeners swear by this combination, dill can actually inhibit tomato growth, and in our short growing season, you want every advantage for heat-loving crops like tomatoes.
🌸Best Flowers to Plant with Dill
These flowers protect your Dill from pests and attract pollinators for better harvests.
For Pest Control




Get a Reminder When It's Time to Plant
We'll email you when key planting windows open for your zone.