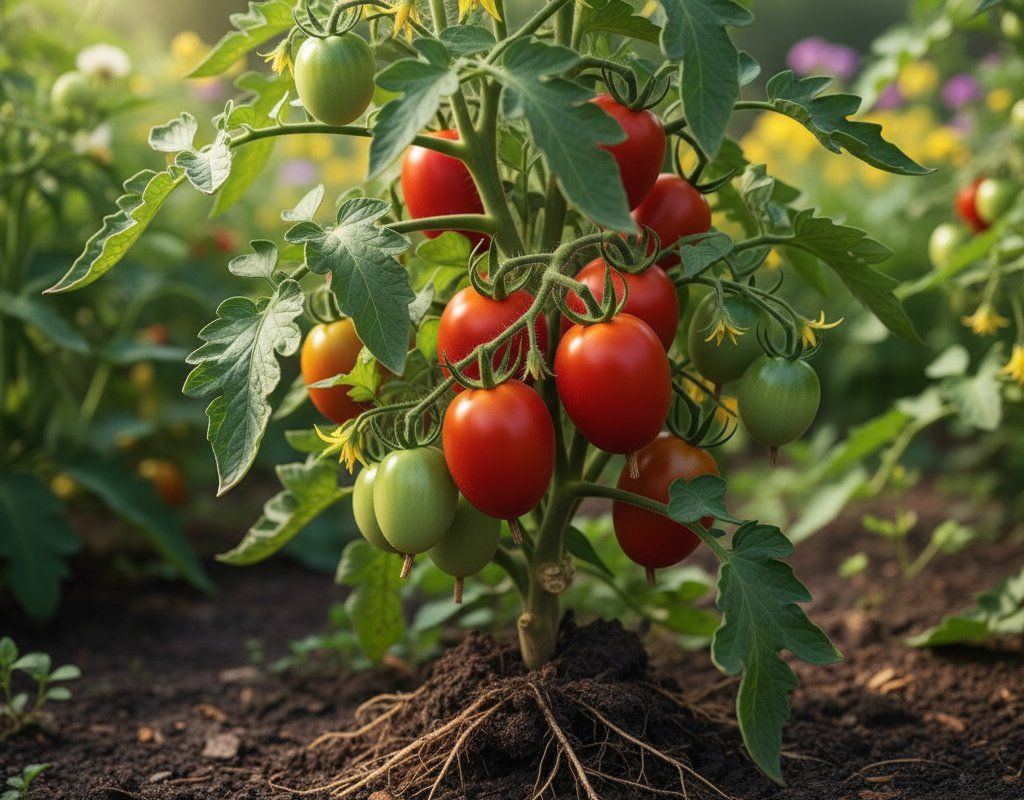
Roma Tomatoes in Zone 10A — Desert Southwest
Solanum lycopersicum · Your Complete 2026 Planting Guide
Check Planting Details Below
See the full planting guide for timing information.
How to Plant Roma Tomatoes in Zone 10A — Desert Southwest
Here are all your options for getting roma tomatoes in the ground, from the easiest method to more advanced approaches.
Start Seeds Indoors
RecommendedMid December through early January
around December 23
Then transplant: Early February through early March
Start seeds 6-8 weeks before transplanting outdoors.
Buy Starts
Works WellEarly February through early March
around February 3
Plant purchased starts after last frost (January 20).
Direct Sow Seeds
ChallengingDirect sowing is not typical for Roma Tomatoes.
Transplant Outdoors
Timing InfoEarly February through early March
around February 3
Wait until nighttime temperatures stay above 50°F.
You have a nice window — no need to rush.
Overview
Roma tomatoes thrive in our Zone 10A desert climate, delivering meaty, paste-type fruit perfect for salsas, sauces, and roasting. These determinate plants produce concentrated harvests that ripen before our extreme heat hits, making them ideal for Desert Southwest gardeners who want to preserve their bounty. The thick walls and low seed content make Roma tomatoes particularly valuable here where fresh produce can be expensive and quality inconsistent during summer months.
While our arid climate and alkaline soils present challenges, Roma tomatoes actually benefit from our predictable weather patterns and low disease pressure. With our 339-day growing season, you can time your plantings to harvest before the brutal summer heat arrives. The key is starting early and maintaining consistent moisture through our dry spring months.
Starting Seeds Indoors
Start your Roma tomato seeds indoors from mid-December through early January, about six weeks before transplanting outdoors. Our very early spring character means you'll be setting transplants out while other regions are still dealing with snow, so indoor starting is essential to get ahead of the season.
Set up your seed trays in a warm spot with good light - a south-facing window works, or use grow lights for more control. Roma seeds germinate best with soil temperatures around 70-75°F, which is easily maintained indoors during our mild winter months. Use bottom watering to keep soil evenly moist without disturbing the emerging seedlings.
Once seedlings develop their first true leaves, begin weekly feeding with diluted fertilizer. Your indoor-started plants will be ready to transplant when nighttime temperatures stay consistently above 50°F and they've developed 3-4 sets of true leaves.
Transplanting Outdoors
Transplant your Roma tomato seedlings outdoors from early February through early March, timing it for after our last frost window in mid-January. Even though hard freezes are rare here, those occasional cold snaps can still damage tender plants, so don't rush this step.
Spend a full week hardening off your seedlings by gradually exposing them to outdoor conditions. Start with a few hours of morning sun, gradually increasing exposure time and intensity. Desert sun is intense even in February, so this gradual transition prevents transplant shock and sunscald on young leaves.
Space your Roma plants 24-36 inches apart to ensure good air circulation - this becomes critical later when monsoon humidity arrives. Plant them slightly deeper than they were in their containers, burying part of the stem to encourage strong root development. Choose your sunniest spot, as these plants need 6-8 hours of direct sunlight daily.
Watering Roma Tomatoes in Zone 10A (Desert Southwest)
Roma tomatoes have high water needs and absolutely cannot tolerate drought stress, especially in our arid climate where moisture evaporates quickly. These paste tomatoes are particularly susceptible to blossom end rot when watering is inconsistent, as the calcium uptake gets disrupted by drought-flood cycles that are easy to create here.
Water deeply 2-3 times per week during spring, providing about 1-2 inches of water weekly. Use the finger test - stick your finger 2 inches into the soil, and if it's dry, it's time to water. As temperatures climb toward summer, you'll need to increase both frequency and amount, potentially watering daily once highs reach the upper 90s.
Always water at the base of plants rather than overhead to conserve moisture in our low humidity conditions. Soaker hoses or drip irrigation work exceptionally well here, delivering water directly to roots while minimizing evaporation. Watch for signs of stress: wilting during the hottest part of the day (even with adequate moisture) is normal, but wilting in morning or evening indicates insufficient water.
Apply a 3-4 inch layer of mulch around plants to retain moisture and keep soil temperatures more moderate. In our desert climate, consistent moisture is the single most important factor for preventing fruit problems and maintaining healthy plants through the heat.
Supporting Your Roma Tomatoes
Roma tomatoes are determinate varieties that stay relatively compact, but their heavy fruit load still benefits from support structures. Install tomato cages or stakes at planting time to avoid disturbing established root systems later.
For determinate Roma plants, you can use shorter cages (4-5 feet) rather than the tall indeterminate types need. The plants will reach about 3-4 feet tall and produce most of their fruit within a concentrated timeframe. If using stakes, choose sturdy 6-foot stakes driven 18 inches into the ground.
Train the main stem upward through cage openings or tie loosely to stakes using soft materials like cloth strips. Roma plants don't require extensive pruning like indeterminate varieties, but you can remove suckers below the first flower cluster to direct energy into fruit production.
🧪Fertilizing Roma Tomatoes
Feeding Schedule
Organic Fertilizer Options
Harvest Time
Expect your first Roma tomatoes from mid-April through early June, about 75 days from transplanting. The concentrated harvest window works perfectly with our Desert Southwest climate - you'll get most of your crop before extreme heat stress hits the plants.
Harvest Roma tomatoes when they develop deep red color throughout and feel firm with just slight give when gently squeezed. The fruit should detach easily from the stem with a gentle twist and pull. Unlike slicing tomatoes, Roma varieties won't continue ripening much on the plant once they reach full size, so harvest promptly.
These paste tomatoes can ripen successfully indoors if picked when they show the first blush of color, which is helpful as temperatures climb. Store unripe fruit at room temperature away from direct sunlight. Fully ripe Roma tomatoes keep better in cool conditions but should be used within a week.
Since your first frost won't arrive until late December, you may be able to get a second planting for fall harvest. Plant again in late July for a November harvest, though extreme summer heat makes this challenging even for experienced desert gardeners.
Common Problems in Zone 10A (Desert Southwest)
Blossom End Rot Dark, sunken patches appear on the bottom (blossom end) of developing fruit, eventually turning black and leathery. This affects Roma tomatoes particularly severely because of their elongated shape. The problem typically shows up on the first fruit clusters and can devastate your early harvest.
Our inconsistent watering patterns in arid conditions trigger this calcium deficiency issue. It's not a disease but a nutrient uptake problem caused by drought stress followed by heavy watering. Maintain consistent soil moisture through deep, regular watering and thick mulch layers. Remove affected fruit immediately and focus on steady watering schedules.
Early Blight Brown spots with distinctive concentric rings (bullseye pattern) develop on lower leaves first, then spread upward. Leaves turn yellow and drop, weakening the plant. In our climate, this fungal disease often appears when monsoon moisture combines with warm temperatures.
Prevent soil splash onto leaves by mulching heavily and watering only at the base of plants. Remove affected leaves immediately and destroy them - never compost diseased plant material. Ensure good air circulation by proper spacing and avoid overhead watering during humid monsoon periods.
Fusarium Wilt Plants wilt on one side first, with yellowing leaves that eventually spread throughout the plant. Cut stems reveal brown streaking inside - this is a clear diagnostic sign. Once infected, plants rarely recover and should be removed immediately.
This soil-borne fungus thrives in our warm soil temperatures and persists for years. Plant only resistant varieties marked with 'F' on seed packets, rotate crops yearly, and consider raised beds with fresh soil if this becomes recurring problem. Our alkaline soil conditions can be modified to pH above 6.5 to reduce fungal activity.
Desert Southwest Specific Challenges Our extreme heat and intense UV radiation can cause sunscald on fruit, especially on plants that become water-stressed. The combination of low humidity, alkaline soils, and irregular monsoon moisture creates perfect conditions for both blossom end rot and mineral deficiencies. Focus on consistent irrigation, shade cloth during peak summer if growing fall crops, and soil amendments to maintain proper pH and calcium availability.
Best Companions for Roma Tomatoes
Plant these nearby for healthier Roma Tomatoes and better harvests.
View Full Companion Planting Chart →


Companion Planting Details
Plant basil alongside your Roma tomatoes - it naturally repels aphids and thrips while improving flavor, and both crops share similar watering needs in our arid climate. Carrots work well as ground cover companions, helping retain soil moisture while their taproots break up our notorious caliche layer. Marigolds provide pest control against nematodes and whiteflies, both common problems in warm Desert Southwest soils.
Avoid planting brassicas like cabbage or broccoli near Roma tomatoes, as they compete for nutrients and can harbor similar pests. Fennel produces chemicals that inhibit tomato growth, and corn attracts corn earworms that readily move to tomato fruit. In our intense growing conditions, keeping companions simple and beneficial helps both plants thrive without additional stress.
🌸Best Flowers to Plant with Roma Tomatoes
These flowers protect your Roma Tomatoes from pests and attract pollinators for better harvests.
For Pest Control



For Pollinators

Get a Reminder When It's Time to Plant
We'll email you when key planting windows open for your zone.