
Tomato in Zone 7B — Northern California
Solanum lycopersicum · Your Complete 2026 Planting Guide
Missed Seed Starting? No Problem!
Wait for starts to become available.
What to Do
Starts will be available at nurseries in 25 days (around March 29).
How to Plant Tomato in Zone 7B — Northern California
Here are all your options for getting tomato in the ground, from the easiest method to more advanced approaches.
Start Seeds Indoors
RecommendedEarly February through early March
around February 15
Then transplant: Late March through late April
Start seeds 6-8 weeks before transplanting outdoors.
Tomatoes need 6-8 weeks head start indoors for best production.
Buy Starts
Works WellLate March through late April
around March 29
Plant purchased starts after last frost (March 15).
Look for stocky plants with dark green leaves. Avoid leggy or already-flowering seedlings.
Direct Sow Seeds
ChallengingDirect sowing is not typical for Tomato.
Transplant Outdoors
Timing InfoLate March through late April
around March 29
Wait until nighttime temperatures stay above 50°F.
You have a nice window — no need to rush.
Overview
Growing tomatoes in Northern California's Zone 7B is like hitting the gardening jackpot. Our Mediterranean climate with its long, warm growing season creates perfect conditions for producing sun-ripened fruit that puts anything from the grocery store to shame. You'll get months of fresh tomatoes for salsas, caprese salads, and that perfect BLT, all while enjoying the satisfaction of nurturing plants from tiny seeds to heavy-laden vines in your own backyard.
While our region brings challenges like drought, water restrictions, and those unpredictable microclimates that can vary dramatically even within a few miles, proper timing makes tomato growing completely manageable. With our generous 245-day growing season and mild winters, you have plenty of flexibility to work around these hurdles and still harvest baskets of homegrown tomatoes from early summer through fall.
Starting Seeds Indoors
Start your tomato seeds indoors during early February through early March, about 6 weeks before you plan to transplant outdoors. This timing takes advantage of Northern California's early spring character while ensuring your seedlings are strong enough to handle our variable spring weather. Set up seed trays in a warm spot (70-75°F) with good light—a sunny south-facing window works, though a grow light gives more consistent results.
Sow seeds about ¼ inch deep in quality seed starting mix, then bottom water by placing trays in shallow pans of water until the soil surface feels moist. This method prevents disturbing the seeds and reduces the risk of damping-off disease that can plague tomato seedlings. Keep the soil consistently moist but not waterlogged.
Once seedlings develop their first true leaves (the ones that actually look like tomato leaves), give them as much bright light as possible to prevent that leggy, stretched appearance. If using a grow light, keep it just 2-3 inches above the plants and raise it as they grow.
Transplanting Outdoors
Transplant your tomato seedlings outdoors from late March through late April, after our last frost risk passes in mid-March. Before planting, harden them off gradually over a week by placing them outdoors for increasingly longer periods, starting with just an hour or two in filtered light and working up to full days outside. This prevents transplant shock when they encounter our sometimes-breezy spring conditions and temperature swings.
Choose stocky plants with dark green leaves and thick stems—avoid any that are already flowering or look tall and spindly. Space plants 24-36 inches apart to ensure good air circulation, which becomes crucial during our dry summers when fungal diseases can take hold. Plant them slightly deeper than they were growing in their pots, burying part of the stem to encourage a stronger root system.
Northern California's spring weather can be unpredictable, with warm spells followed by cooler periods, so keep row covers or cloches handy for the first few weeks after transplanting. Once nighttime temperatures consistently stay above 50°F, your tomatoes will take off.
Watering Tomato in Zone 7B (Northern California)
Tomatoes need consistent, deep watering to thrive in Northern California's dry summer climate, and this becomes your most critical task once our rainy season ends in late spring. Plan to provide about 1-2 inches of water per week, increasing this during heat waves when temperatures climb toward our typical 88°F summer highs. With our low humidity and negligible summer rainfall, you'll be the sole provider of moisture from May through October.
Water deeply at the base of plants rather than overhead—our low humidity means disease pressure is lower than in muggy climates, but wet foliage can still invite problems. Use the finger test by pushing 2 inches into the soil near the plant; if it's dry at that depth, it's time to water. During hot spells, you might need to water every other day, while cooler periods might require watering just twice a week.
Inconsistent watering causes more tomato problems than almost anything else in our climate. When you let plants get bone dry and then flood them, you'll see blossom end rot (that black, sunken spot on the bottom of fruit), cracking when fruit absorbs water too quickly, and blossom drop from plant stress. Set up soaker hoses or drip irrigation if possible—they deliver water efficiently while conserving this precious resource during drought years and water restrictions.
Apply a 2-3 inch layer of mulch around plants to help retain moisture and reduce your watering frequency. In our climate, organic mulches like shredded leaves or straw work well, breaking down slowly while keeping soil cool and moist during those long, hot summer stretches.
Supporting Your Tomato
Install sturdy support systems at planting time since indeterminate tomatoes will grow 6-8 feet tall in our long growing season. Heavy-duty tomato cages (5-6 feet tall) or strong stakes work well, though cages are easier to manage as plants get large and heavy with fruit. Flimsy store-bought cages will buckle under the weight of a mature plant loaded with tomatoes.
If using stakes, choose 6-foot tall, 2-inch diameter posts and hammer them 12 inches into the ground. Tie the main stem loosely to the stake with soft materials like cloth strips or tomato ties, adding new ties every 12-18 inches as the plant grows. Avoid wire or string that can cut into stems as they thicken.
Train plants by gently weaving branches through cage openings or tying them to stakes weekly. Our consistent growing conditions mean plants will put on steady growth from transplant through fall, so staying on top of support prevents branches from breaking under their own weight.
Pruning & Maintaining Tomato
Remove suckers (shoots growing between the main stem and branches) that develop below the first flower cluster throughout the growing season. These lower suckers compete with fruit production and can make plants bushy at ground level where air circulation is poorest. Pinch them off when they're small and tender, ideally in the morning when plants are well-hydrated.
Upper suckers can be left alone or removed depending on your goals—removing them directs more energy into fewer, larger tomatoes. In our long growing season, plants have time to support multiple branches, so moderate sucker removal works well. Remove any yellow or diseased lower leaves throughout the season to improve air flow and reduce disease pressure.
As first frost approaches in mid-November, top your plants by pinching out the growing tips about a month beforehand. This stops new growth and directs energy into ripening existing fruit. Remove any flowers that appear in late September since they won't have time to mature before frost arrives.
🧪Fertilizing Tomato
Feeding Schedule
Organic Fertilizer Options
Harvest Time
Expect your first ripe tomatoes from early June through late July, depending on variety and when you transplanted. Most tomatoes are ready when they're fully colored but still have a slight give when gently squeezed—they should twist off the vine easily without tugging. Harvest regularly, even daily during peak season, to encourage continued production through our long growing season.
Pick tomatoes in the morning when they're cool and firm. If a tomato has started to change color but isn't fully ripe, you can harvest it and let it finish ripening on the kitchen counter—this prevents overripe fruit from attracting pests and reduces splitting during hot weather. Fully green tomatoes won't ripen well off the vine, so leave those to continue developing.
Keep plants productive by harvesting promptly and providing consistent water and nutrients. In our climate, tomatoes will continue producing until first frost in mid-November, giving you months of fresh fruit. Remove overripe or damaged tomatoes immediately to prevent attracting insects and diseases.
When frost threatens in November, harvest all remaining fruit regardless of ripeness. Green tomatoes can be used for frying, pickles, or wrapped individually in newspaper to ripen slowly indoors. This final harvest often yields enough green tomatoes to extend your tomato season into December with proper indoor ripening.
Common Problems in Zone 7B (Northern California)
Blossom End Rot Dark, sunken, leathery patches appear on the bottom (blossom end) of tomatoes, often affecting the first fruits of the season. The spots start small but can cover half the tomato, making fruit inedible where affected. This isn't a disease but a calcium deficiency caused by inconsistent watering—our dry summer climate makes this Northern California's most common tomato problem. When soil moisture fluctuates dramatically, plants can't uptake calcium properly even if plenty exists in the soil. Maintain consistent moisture with regular deep watering and 2-3 inches of mulch. Avoid over-fertilizing with nitrogen, which can interfere with calcium uptake.
Early Blight Brown spots with distinctive concentric rings (like a bullseye or target) appear on lower leaves first, then spread upward. Affected leaves turn yellow and drop off, potentially defoliating entire plants. This fungal disease thrives when water splashes soil onto lower leaves, then spreads in warm conditions—exactly what happens during overhead watering in our summer heat. Remove affected leaves immediately and destroy them (don't compost). Water at soil level, not overhead, and mulch to prevent soil splash. Improve air circulation through proper spacing and pruning lower branches. Copper-based fungicides can slow spread if applied early.
Hornworms Large sections of leaves disappear overnight, with dark droppings visible on remaining foliage. These large green caterpillars (up to 4 inches long) with white diagonal stripes are nearly invisible against tomato plants but can strip entire branches quickly. They're larvae of hawk moths that lay eggs on tomato family plants during our warm summer months. Handpick hornworms in early morning when they're easier to spot—they don't bite or sting. Bt (Bacillus thuringiensis) spray provides organic control. If you find hornworms covered with small white cocoons, leave them alone—those are beneficial parasitic wasp eggs that will kill the hornworm and produce more helpful wasps.
Cracking Splits appear in tomato skins, either in concentric circles around the stem end or as radial lines extending from the stem. These cracks expose fruit flesh to rot and insects, ruining otherwise perfect tomatoes. Heavy watering after dry spells causes fruit to absorb water faster than skin can expand—a common problem when our first fall rains arrive after months of drought, or when gardeners overcompensate after forgetting to water. Maintain consistent soil moisture throughout the growing season with regular watering and thick mulch. Harvest tomatoes promptly when ripe, and choose crack-resistant varieties for future seasons.
Northern California Specific Challenges: Our combination of moderate-to-hot summer heat, extremely low humidity, and months without rain creates unique challenges for tomato growing. The dry air means disease pressure is generally lower than in humid climates, but water stress becomes critical. Microclimates vary dramatically—coastal gardens deal with cool fog while inland areas face intense heat—so adjust watering schedules to your specific location's conditions.
Best Companions for Tomato
Plant these nearby for healthier Tomato and better harvests.
View Full Companion Planting Chart →


Companion Planting Details
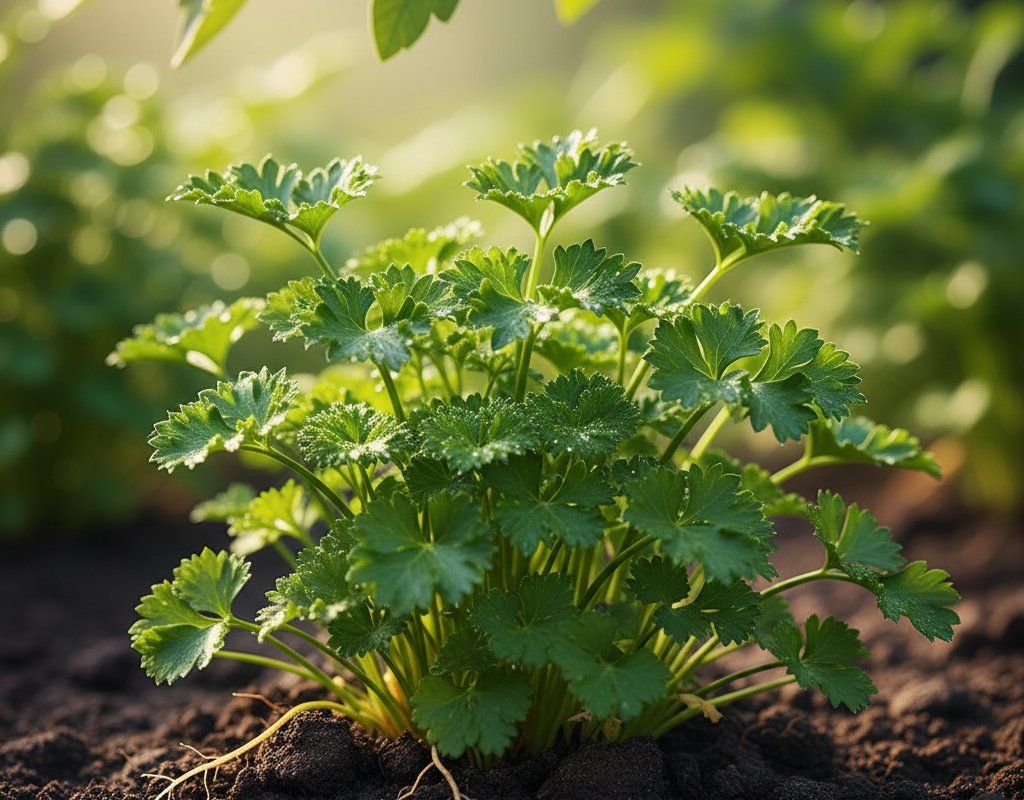
Plant basil alongside your tomatoes for a classic pairing that benefits both crops. Basil's strong scent helps deter aphids and hornworms while thriving in the same warm, well-watered conditions tomatoes prefer. Carrots make excellent ground-level companions since their deep taproots don't compete with tomato roots, and both crops appreciate consistent moisture during our dry summers. Parsley provides similar benefits, plus its flowers attract beneficial insects that prey on tomato pests. Marigolds planted around the tomato bed create a living barrier against nematodes and whiteflies while adding cheerful color throughout the growing season.
Avoid planting brassicas like broccoli, cabbage, or kale near tomatoes since they compete for nutrients and can stunt tomato growth. Fennel releases compounds that inhibit tomato development, while corn attracts the same hornworms that devastate tomato plants—you'll just be providing more habitat for these voracious pests. In Northern California's long growing season, stick with Mediterranean herbs and heat-loving companions that share similar water and sun requirements rather than fighting against our natural climate patterns.
🌸Best Flowers to Plant with Tomato
These flowers protect your Tomato from pests and attract pollinators for better harvests.
For Pest Control







Get a Reminder When It's Time to Plant
We'll email you when key planting windows open for your zone.