Yellow Squash in Zone 9A — Southern California
Cucurbita pepo · Your Complete 2026 Planting Guide
Time to Buy Starts!
Seed starting window passed, but starts are available now.
Buy Starts Now
Head to your local nursery, Home Depot, or farmers market for transplants.
- Look for stocky plants with dark green leaves
- Avoid leggy seedlings or plants already flowering
- Check that roots aren't circling the pot (rootbound)
How to Plant Yellow Squash in Zone 9A — Southern California
Here are all your options for getting yellow squash in the ground, from the easiest method to more advanced approaches.
Direct Sow Seeds
RecommendedEarly February through mid October
around February 8
Consider succession planting every 2-3 weeks for continuous harvest.
Grows quickly from seed. Direct sowing is easiest.
Buy Starts
Works WellMid February through late March
around February 15
Plant purchased starts after last frost (February 1).
Start Seeds Indoors
Works WellMid January through early February
around January 25
Then transplant: Mid February through late March
Start seeds 3-5 weeks before transplanting outdoors.
Transplant Outdoors
Timing InfoMid February through late March
around February 15
Wait until nighttime temperatures stay above 50°F.
You have a nice window — no need to rush.
Overview
Yellow squash is a fantastic addition to any Southern California garden. Its mild, slightly sweet flavor makes it incredibly versatile in the kitchen, perfect for everything from grilling and sautéing to adding to soups and stews. Plus, the satisfaction of harvesting your own homegrown squash, bursting with sunshine, is hard to beat.
While our SoCal climate with its summer heat inland presents unique challenges like drought and Santa Ana winds, the long 322-day growing season provides ample opportunity to successfully grow yellow squash. Smart timing and water-wise practices are key to enjoying a bountiful harvest.
Starting Seeds Indoors
Starting yellow squash indoors is possible, but generally not needed in our Zone 9A climate with its very-early spring character. Because squash grows so quickly, direct sowing is usually the easiest and most successful method. However, if you want a head start, you can start seeds indoors from mid January through early February, about three weeks before you plan to transplant.
Use seed starting trays with a well-draining seed starting mix. Provide warmth with a heat mat and plenty of light with grow lights. Bottom watering is ideal to prevent damping off; set the tray in a shallow dish of water and let the soil absorb moisture from the bottom.
Transplanting Outdoors
Transplant your seedlings outdoors from mid February through late March, after they have developed a few true leaves. Before transplanting, harden off your seedlings by gradually exposing them to outdoor conditions for about a week. This will help them adjust to the sun and wind.
Choose a sunny spot with well-drained soil, and space your plants 24-36 inches apart. Be mindful of potential late frosts or cool spells, especially in inland areas, and protect young plants with row covers if needed.
Direct Sowing
Direct sowing is the preferred method for growing yellow squash in Southern California. The long growing season allows for multiple plantings. Sow seeds directly into the ground from early February through mid October.
Choose a location that receives full sun (at least 6-8 hours a day). Prepare the soil by amending it with compost or other organic matter. Plant seeds 1 inch deep and 24-36 inches apart. Keep the soil consistently moist until the seedlings emerge, usually within a week. Since squash grows quickly from seed, this is the easiest option for most SoCal gardeners.
Watering Yellow Squash in Zone 9A (Southern California)
Yellow squash needs consistent watering, especially in our hot and often dry Southern California climate. While not drought-tolerant, smart watering practices can help conserve water. Aim for deep watering at the base of the plant to encourage strong root growth and prevent fungal diseases.
During the cooler spring and fall months, water deeply once or twice a week, providing about 1-2 inches of water per week. In the heat of summer inland, increase watering to every other day or even daily, especially during heat waves. Use the "finger test" – stick your finger into the soil about 2 inches deep. If it feels dry, it's time to water.
Water in the morning to allow foliage to dry before nightfall, minimizing the risk of powdery mildew in our low-to-moderate humidity. Avoid overhead watering, which can also contribute to fungal issues. Signs of underwatering include wilting leaves and stunted growth. Overwatering can lead to root rot, indicated by yellowing leaves and a mushy stem base. Mulching around the plants with straw or wood chips helps retain moisture and regulate soil temperature, crucial in our climate.
🧪Fertilizing Yellow Squash
Feeding Schedule
Organic Fertilizer Options
Harvest Time
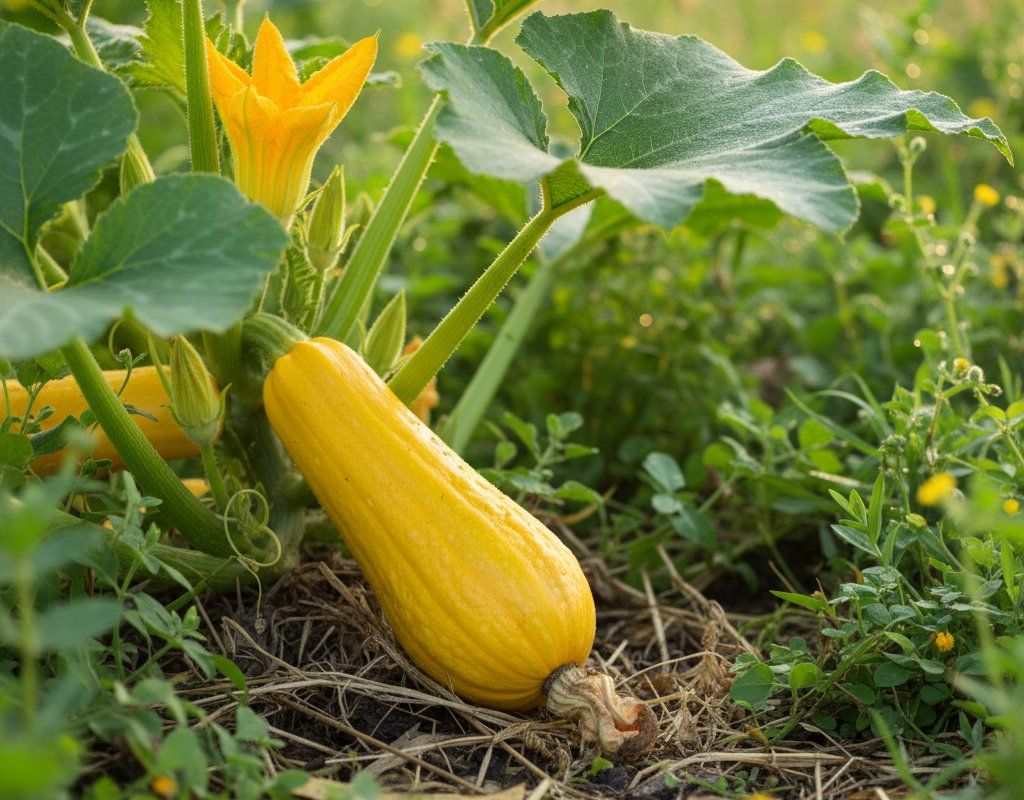
You can expect your first yellow squash harvest from late March through mid December, about 50 days after planting. Harvest when the squash are 6-8 inches long and the skin is still tender enough to dent with your fingernail. Smaller squash are generally more flavorful and have fewer seeds.
Use a sharp knife or pruning shears to cut the squash from the vine, leaving a short stem attached. This helps prevent rot. Harvest regularly to encourage continued production. Yellow squash is a continuous harvest crop, so the more you pick, the more the plant will produce.
As the first frost approaches in mid- December, harvest any remaining squash, even if they are slightly smaller than usual. While they won't ripen off the vine, they can still be used in cooking.
Common Problems in Zone 9A (Southern California)
Yellow squash can face a few common problems in Southern California gardens. Here's how to identify, fix, and prevent them:
Squash Vine Borer
- What it looks like: Wilting vines that suddenly collapse, often with small holes near the base of the stem and sawdust-like frass.
- What causes it: Moth larvae that bore into the stems and feed on the plant's tissues.
- How to fix/prevent it: Inspect stems regularly for holes and frass. If caught early, you can try to remove the borer manually by slitting the stem open, removing the larva, and then burying the stem in soil to encourage rooting. Wrap the base of the stems with foil or netting to deter moths from laying eggs.
Powdery Mildew
- What it looks like: White or grayish powdery coating on leaves, stems, and sometimes fruit. Leaves curl, yellow, and die.
- What causes it: Various fungi that thrive in warm days, cool nights, and moderate humidity. Dry leaf surfaces actually favor it.
- How to fix/prevent it: Improve air circulation through spacing and pruning. Remove affected leaves. Neem oil or potassium bicarbonate sprays help. Milk spray (1 part milk to 9 parts water) is surprisingly effective. Plant resistant varieties.
Squash Bugs
- What it looks like: Gray-brown shield-shaped bugs on leaf undersides. Bronze egg clusters on leaves. Wilting leaves that turn brown and crispy.
- What causes it: Sap-sucking insects that inject toxin while feeding. Adults overwinter in garden debris and emerge in spring.
- How to fix/prevent it: Hand-pick adults and crush egg clusters. Board traps (adults hide under boards at night — flip and destroy in morning). Neem oil spray. Remove plant debris in fall. Companion plant with nasturtiums.
Blossom End Rot
- What it looks like: Sunken, dark brown or black leathery patch on the bottom (blossom end) of fruit. Often affects first fruits of the season.
- What causes it: Calcium deficiency caused by inconsistent watering. Not a disease — it's a nutrient uptake problem triggered by drought/flood cycles.
- How to fix/prevent it: Water consistently (the single most effective fix). Mulch heavily to maintain even soil moisture. Don't over-fertilize with nitrogen. Calcium sprays help marginally. Remove affected fruit.
Southern California Specific Challenges: Our hot summers inland can stress squash plants, making them more susceptible to pests and diseases. The low-to-moderate humidity generally helps prevent fungal issues, but powdery mildew can still be a problem with temperature swings. Consistent watering is crucial, especially during drought periods and under water restrictions, to prevent blossom end rot. Santa Ana winds can also dry out plants quickly, so extra watering and wind protection may be needed.
Best Companions for Yellow Squash
Plant these nearby for healthier Yellow Squash and better harvests.

Keep Away From
Companion Planting Details
Companion planting can significantly benefit your yellow squash in Southern California. Corn provides a natural trellis for climbing bean varieties, which in turn fix nitrogen in the soil, benefiting the squash. Radishes, planted between squash plants, deter pests and break up the soil. Marigolds are excellent for repelling nematodes and other harmful insects.
Avoid planting yellow squash near potatoes, as they compete for the same nutrients. Brassicas (cabbage, broccoli, kale) can also inhibit squash growth. By choosing the right companions, you can create a thriving and productive garden ecosystem.
🌸Best Flowers to Plant with Yellow Squash
These flowers protect your Yellow Squash from pests and attract pollinators for better harvests.


Get a Reminder When It's Time to Plant
We'll email you when key planting windows open for your zone.