Dill in Zone 10B — Florida
Anethum graveolens · Your Complete 2026 Planting Guide
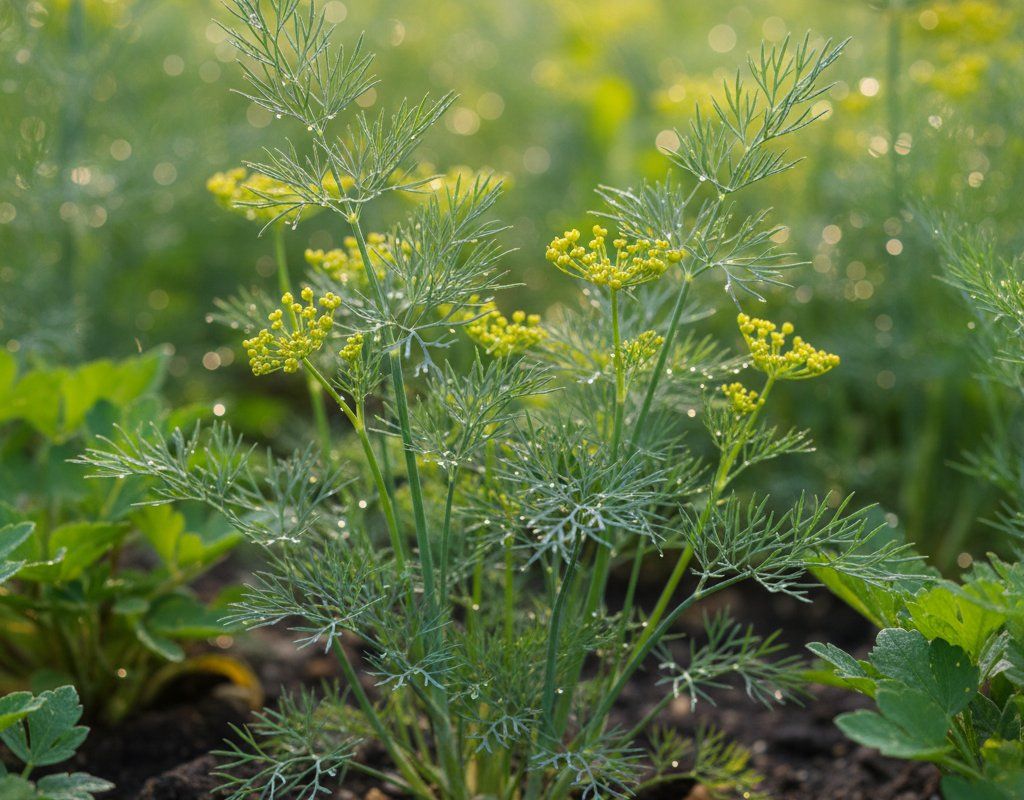
Harvest Time!
Your Dill should be producing now!
Harvest Tips
Harvest in the morning after dew dries for the best flavor.
How to Plant Dill in Zone 10B — Florida
Here are all your options for getting dill in the ground, from the easiest method to more advanced approaches.
Direct Sow Seeds
RecommendedEarly January through early November
around January 5
Consider succession planting every 2-3 weeks for continuous harvest.
Dill has a taproot and prefers direct sowing, but transplants work if handled carefully.
Start Seeds Indoors
RecommendedEarly to late December
around December 15
Then transplant: Mid January through late February
Start seeds 4-6 weeks before transplanting outdoors.
Buy Starts
Works WellMid January through late February
around January 12
Plant purchased starts after last frost (January 5).
Transplant Outdoors
Timing InfoMid January through late February
around January 12
Can tolerate light frost, but wait for soil to be workable.
You have a nice window — no need to rush.
Fall Planting
Early November through early December
November 19 ideal · Direct sow for fall harvest
Plant a second crop in mid-summer for fall harvest. Dill actually prefers the cooling temperatures of fall.
Overview
Dill thrives beautifully in our Florida gardens, offering that distinctive fresh flavor you just can't get from the dried stuff at the grocery store. Here in Zone 10B, dill's feathery foliage and delicate flowers add texture to your garden while providing continuous harvests for pickles, fish dishes, and potato salads. The herb's quick 40-day maturity means you can enjoy fresh dill almost year-round in our extended growing climate.
Our subtropical conditions do present challenges - dill bolts quickly in summer heat and our high humidity can encourage fungal issues. But timing is everything in Florida gardening, and with our 360-day growing season, you can plant successive crops from fall through spring to keep fresh dill on your table. The key is understanding that summer is our slow season, while fall through spring offers prime growing conditions.
Starting Seeds Indoors
Starting dill indoors isn't the most common approach since this herb develops a taproot and prefers direct sowing, but it can work when you want precise timing. You'll want to start seeds indoors during early to late December, about 4 weeks before your planned transplant date. This timing aligns with our reversed Florida gardening calendar, where we're preparing for our prime growing season while northern gardeners are dormant.
Use seed trays with good drainage and keep soil consistently moist using bottom watering - this prevents the delicate seedlings from getting knocked over. Seeds germinate quickly in our warm indoor conditions, usually within 7-10 days. The challenge with indoor starting is that dill seedlings have sensitive roots, so you'll need to be extra careful during transplanting to avoid disturbing that taproot.
Since dill grows so quickly from seed anyway, most Florida gardeners find direct sowing more reliable. But if you're dealing with nematode issues in your soil or want to get a jump start on the season, starting indoors gives you more control over growing conditions.
Transplanting Outdoors
If you've started dill indoors, plan to transplant during mid-January through late February when our weather stabilizes after the occasional cold snaps. This timing takes advantage of our cooler months before the intense heat arrives. You'll need to harden off your seedlings gradually over about a week, starting with just a few hours of outdoor exposure and building up to full days.
Space your transplants 12 inches apart to give them room to develop their characteristic feathery growth. Handle the seedlings very gently since dill's taproot doesn't appreciate disturbance. Water them in well after transplanting, but avoid overhead watering that sits on the leaves - our high humidity already creates enough moisture for potential fungal issues.
January and February transplants will give you the longest harvest window before our heat triggers bolting. These transplants typically establish quickly in our mild winter temperatures and will be producing harvestable foliage within just a few weeks.
Direct Sowing
Direct sowing is really the preferred method for dill in Florida since it allows that taproot to develop naturally without transplant shock. You can direct sow from early January through early November, though spring and fall plantings perform best. Avoid midsummer sowings during July and August when the heat will cause immediate bolting.
Prepare your soil by working in some compost - our sandy Florida soils drain well but need organic matter for nutrition and moisture retention. Dill seeds are small, so plant them just 1/4 inch deep and space them about 12 inches apart. The seeds germinate quickly in our warm soil, usually sprouting within a week.
For continuous harvests, succession plant every 2-3 weeks during the cooler months. This strategy works particularly well in Florida since our long growing season allows multiple plantings. Direct-sown plants develop stronger root systems and handle our climate fluctuations better than transplants, making them more resilient during those unexpected warm spells that can stress young plants.
Watering Dill in Zone 10B (Florida)
Dill needs consistent moisture but not waterlogged conditions - a balance that requires attention in our humid Florida climate. During our cooler months when dill grows best, natural rainfall is usually moderate, so you'll need to supplement with about 1 inch of water per week. Check soil moisture by sticking your finger 2 inches down; if it's dry, it's time to water.
Water at soil level rather than overhead to prevent fungal issues that thrive in our high humidity. Drip irrigation or soaker hoses work well, or simply water slowly at the base of plants with a watering can. Our sandy soils drain quickly, so you might need to water more frequently than gardeners in other regions, especially during dry spells in winter and spring.
Summer watering becomes critical if you're attempting late spring plantings. The combination of 93°F days and high humidity stresses dill quickly, leading to premature bolting. If you must grow dill in warmer months, provide afternoon shade and water daily, checking soil moisture each morning. Mulch around plants with a light layer of compost to help retain moisture without trapping too much heat.
Watch for signs of water stress: wilting during the heat of the day (even with adequate soil moisture) indicates the plant is struggling with our conditions. Overwatering shows up as yellowing leaves and fungal growth, which spreads rapidly in our humid environment.
🧪Fertilizing Dill
Feeding Schedule
Organic Fertilizer Options
Harvest Time
Your first dill harvest will be ready mid-February through early January, depending on when you planted and our weather patterns. At 40 days from seed, you'll have enough feathery foliage to start snipping for fresh use. The beautiful thing about dill is that you can harvest continuously by cutting outer stems first, allowing the center to keep producing.
Harvest in the early morning when essential oils are strongest and leaves are crisp from cooler overnight temperatures. Cut stems about 6 inches from the base, taking no more than one-third of the plant at a time. This keeps the plant productive longer before it naturally wants to flower and set seed.
For dill seed production, allow some plants to flower and develop seed heads. When the flower heads turn brown and dry (usually in late spring before summer heat arrives), cut the entire head and shake seeds into a paper bag. The timing is crucial in Florida since our heat comes on quickly and can affect seed quality.
As late December approaches and our first frost threatens, harvest remaining foliage for drying or freezing. Unlike northern regions where dill might survive light frosts, our occasional hard freezes will damage plants. However, if you've been succession planting, you should have newer plants ready to carry you through our mild winter months.
Common Problems in Zone 10B (Florida)
Bolting shows up as a sudden flower stalk shooting up from the center of your dill plant, followed by bitter-tasting leaves and reduced foliage production. In Florida, this happens quickly once temperatures consistently hit the upper 80s and our long summer days trigger the flowering response. Heat stress from our intense sun combined with any drought stress accelerates this process dramatically.
To prevent early bolting, time your plantings for fall through early spring when temperatures stay moderate. Provide afternoon shade during late spring plantings and keep soil consistently moist. Choose slower-bolting varieties like 'Fernleaf' for better heat tolerance, and succession plant every 2-3 weeks rather than trying to keep one planting going through changing seasons.
Aphids appear as clusters of tiny green, black, or white insects on stem tips and leaf undersides, leaving behind sticky honeydew that attracts ants. Our warm, humid conditions allow aphid populations to explode rapidly, especially during spring when new growth is tender. You'll notice curled or distorted leaves and a general decline in plant vigor.
Combat aphids with strong water sprays in early morning, allowing leaves to dry quickly in our humidity. Encourage beneficial insects like ladybugs by planting diverse flowers nearby. For heavy infestations, insecticidal soap works well, but avoid treatments during the heat of the day. Our year-round growing season means aphid pressure never completely disappears, so regular monitoring is essential.
Caterpillars, particularly parsley worms and other herb-loving species, can quickly defoliate dill plants in our climate where insects remain active year-round. These green caterpillars blend in well with dill's feathery foliage, so damage often appears suddenly as chewed leaves and bare stems.
Hand-picking works for small infestations - check plants regularly since our warm temperatures speed up their life cycles. Bt (Bacillus thuringiensis) spray provides organic control and won't harm beneficial insects. Row covers help during peak caterpillar seasons, though our humidity requires good air circulation to prevent fungal issues under covers.
Florida Specific Challenges: Our extreme humidity creates perfect conditions for fungal diseases on stressed dill plants, while sandy soils require more frequent watering and fertilizing. Hurricane season can damage or destroy plantings, making succession planting especially important for continuous harvests.
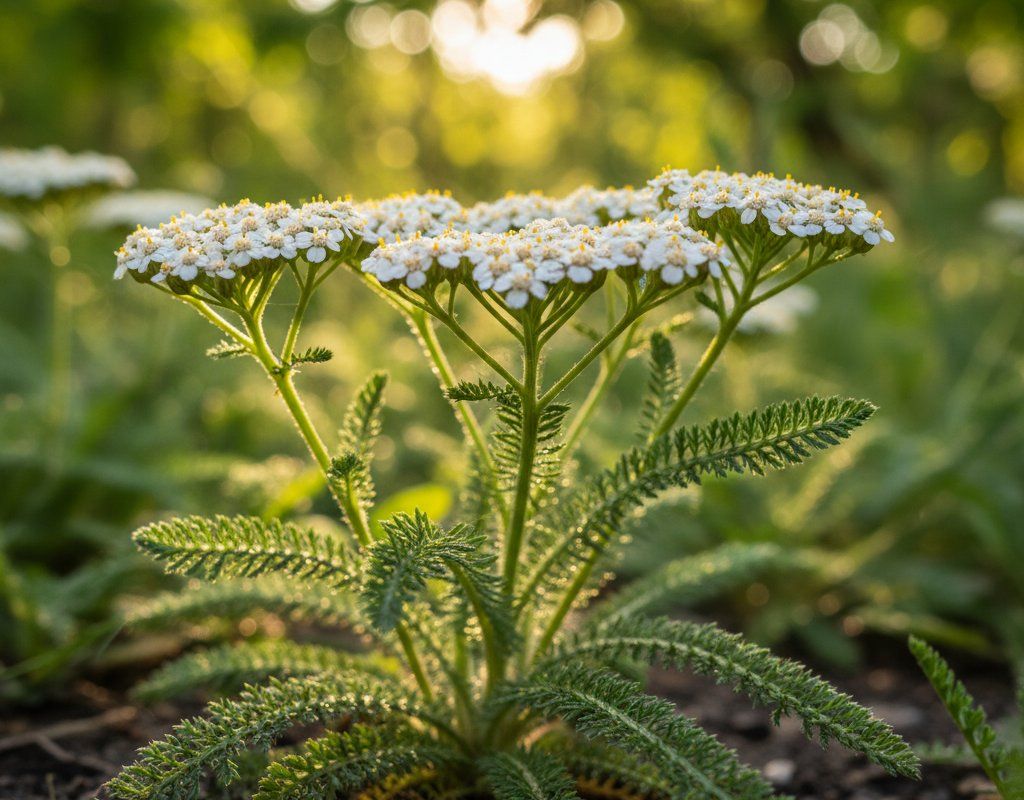
Best Companions for Dill
Plant these nearby for healthier Dill and better harvests.

Keep Away From
Companion Planting Details
Dill pairs excellently with cabbage family crops like broccoli, cauliflower, and kale in Florida gardens since these all prefer our cooler months and similar growing conditions. The dill attracts beneficial insects that help control cabbage worms and aphids that commonly plague brassicas. Plant dill near cucumbers and lettuce as well - the herb's flowers draw pollinators and predatory insects while its feathery foliage provides light shade for lettuce during warming spring days.
Avoid planting dill near tomatoes and carrots. Tomatoes and dill compete for similar nutrients in our sandy soils, and mature dill can actually inhibit tomato growth. Carrots and dill, despite being related plants, don't grow well together since both develop taproots that compete for space and nutrients. In our intense growing conditions, this competition becomes even more pronounced than in cooler climates.
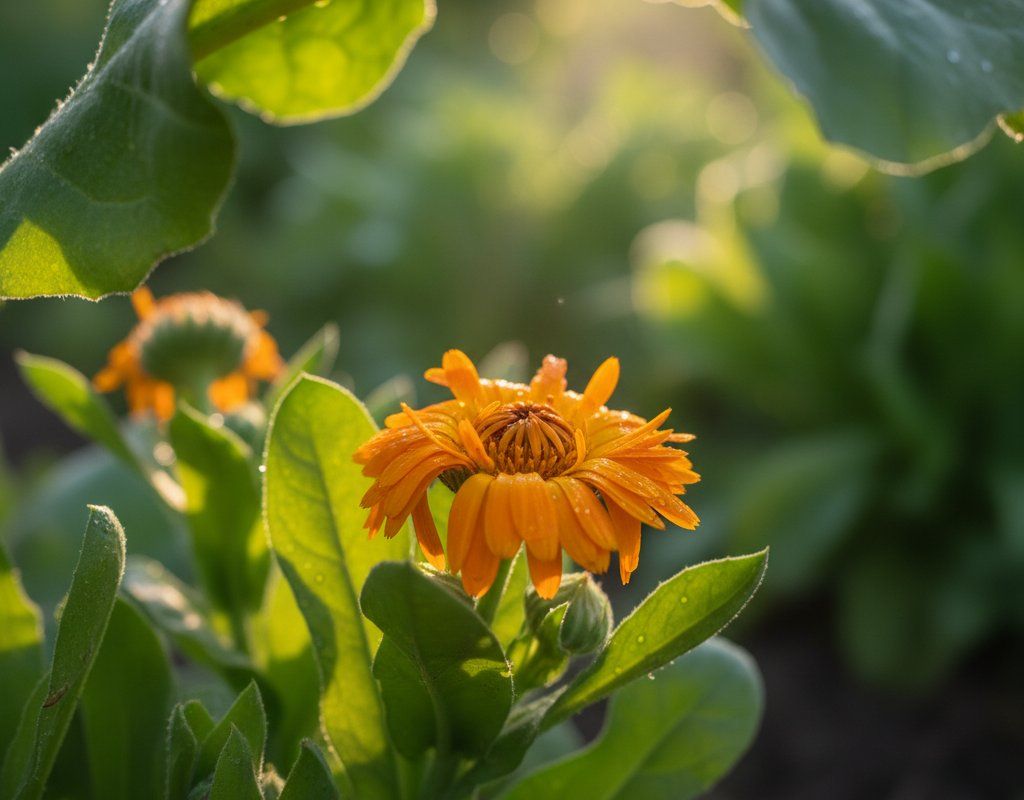
🌸Best Flowers to Plant with Dill
These flowers protect your Dill from pests and attract pollinators for better harvests.
For Pest Control


Get a Reminder When It's Time to Plant
We'll email you when key planting windows open for your zone.